Thinking back to how this whole “book lady” thing started, it all began with an owl. My daughter fell in love with a copy of That’s Not My Owl from the Library, and I set off to find where I could get more of the amazing touchy feely book. I guess you might say my kids have a thing for owls. That is part of the reason that I was so excited when new books came out in January, and I saw This is Owl added to the lineup. We fell in love with this interactive, action based book, and I knew instantly I HAD to create a fun craft project to go along with it! Our paper owl craft came out so cute, that I know you’ll love it too! Especially since you can flap his wings right along with owl in the book! We added some snacks too, because everything is better with snacks. Ready?
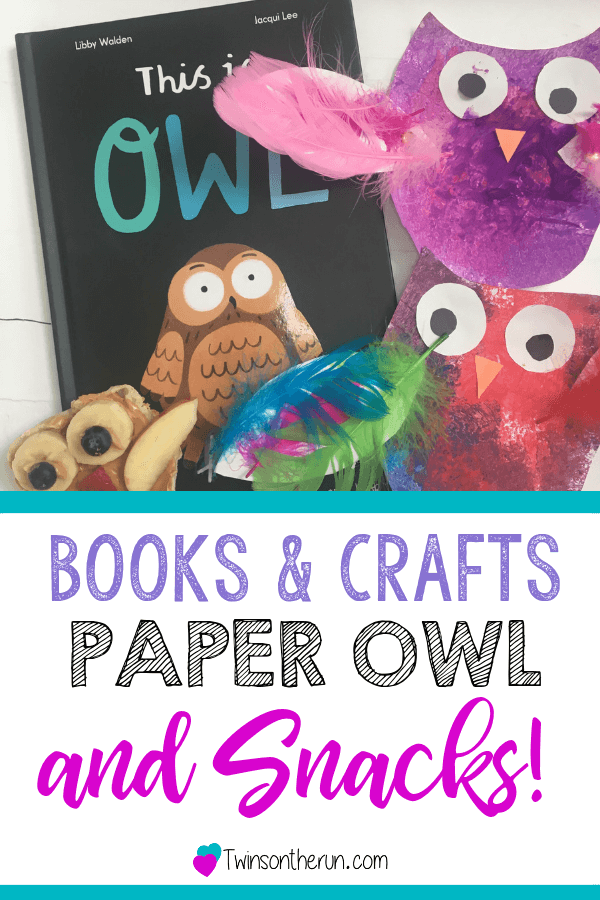
What You Need for Your Paper Owl Craft

- Construction paper or art paper in white
- Scraps of construction Paper in orange & black
- washable paint or tempera paint
- Sponges
- Feathers
- Glue sticks or clear glue
- Flat head paper fasteners
Time for Some Paper Owl Fun!
My craft time prep included cutting out the owl shapes. I used round objects around my house for starting points for the eyes. I made a free-hand pattern for the body and a leaf shape I could use for the wings so that I could use in the future. The body, wings, and large eye circle were all white, with the small black circle for the pupil. I cut a small orange triangle for the nose. I cut up a sponge into a few small squares and gathered the rest of my supplies together.
We headed to our usual spot at the learning tower to make this fun and potentially messy paper owl. I let them each pick 2 colors of paint, which I put small puddles on a paper plate for them to use. Using the sponges, they created a fun sponge art body for their paper owl until the body was covered and they were happy with the outcome. We set them aside to dry (later I used a hair dryer on the cool setting to speed up the process).

While the body was drying, we picked out 3 feathers to glue on each wing. Using a glue stick and a little help, they glued owl’s feathers onto the wings. Since the body still needed time to dry, we moved on to snack time and our book before coming back to the last piece to finish things off.

After snacks and book, we used the glue stick to place the pupil in the eye, and glue owl’s eyes to his body. Using the glue stick again, they place the orange triangle down for owl’s nose too. The most exciting part to me for this paper owl was to make his wings moveable! I used flat headed paper fasteners from an office supply store so that his wings would rotate and move! A few months after creating this project, we make moveable sharks too, make sure to check it out!

Can I just say I am in love with how these turned out? It may be my favorite craft project yet!
Make an Owl Snack!
Since reading the Read Aloud Family, I’ve been thinking more about incorporating snacks as a part of read aloud times. I decided to make this fun owl snack to go along with our paper owl craft, and it was a big hit!

What You Need
- English Muffins
- Peanut Butter
- Banana
- Blueberries
- Strawberry
- Apple
Make a Snack

After cutting the English muffin in half, I lightly toasted it to make it easier to work with. This will be the body of your owl. My kids loved spreading the peanut butter over the top themselves. I sliced some bananas, which they placed on the top of the body for the eyes, and added a little peanut butter to help the blueberry pupils stick to the bananas. Next up was a small strawberry triangle for the nose, and sliced apple wedges for wings! I’m not lying when I say these were gobbled up pretty quickly! I think they were the perfect addition to our paper owl craft & book pairing!
Let’s Read our Owl Book!

When I first saw This is Owl, I imagined it would be another beautiful Kane Miller picture book. What I didn’t realize, was how fun and interactive it would be! This is Owl is filled with interactive action prompts and learning throughout the entire book!

You’ll need to tickle owl awake, flap the book to help him fly, clap your hands to turn off the sun, and tap the egg to help it hatch. I won’t spoil too much of the fun, but this is a must-have book for busy toddlers and preschoolers! Reading aloud books with interactive parts & actions is a great reading tip to keep the most active and energetic kids listening at story time!
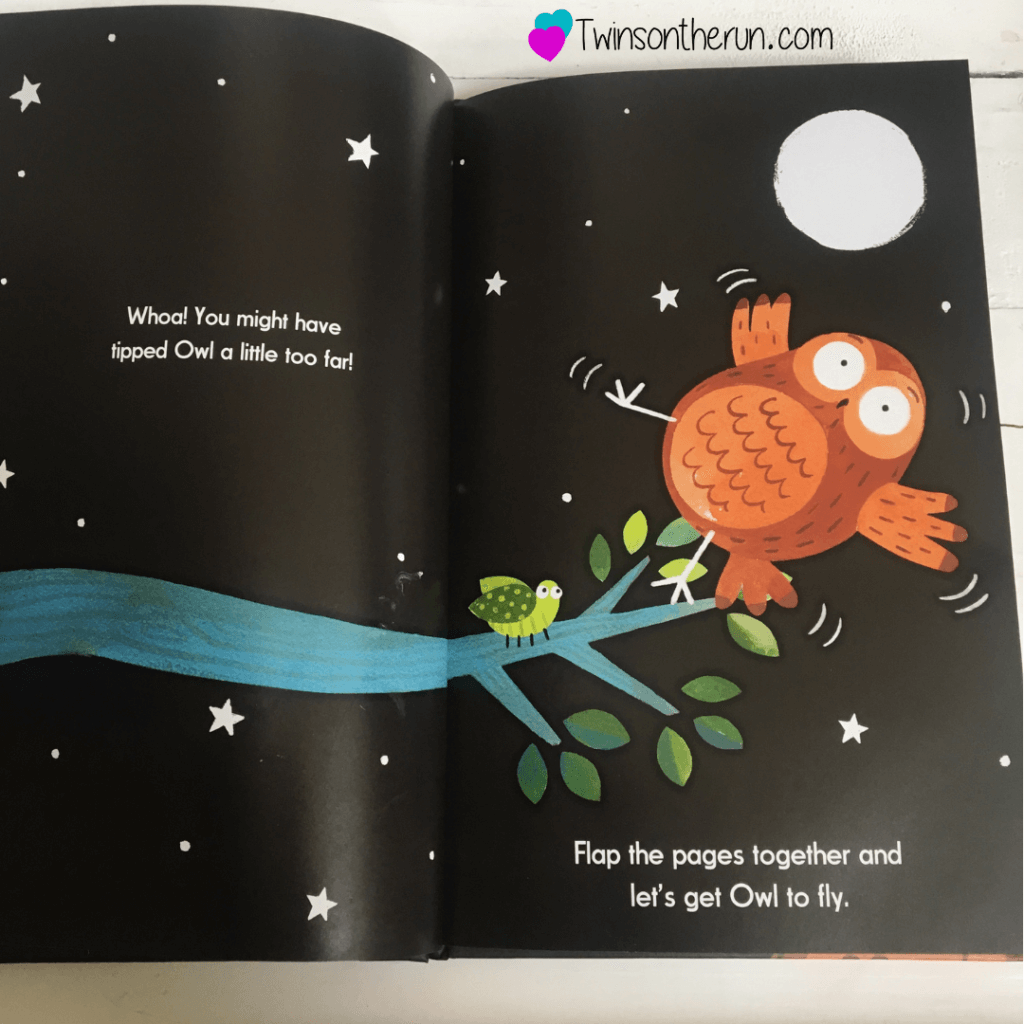
The paper owl craft we made was fun to flap the wings and fly around while we re-read This is Owl over and over through the course of the week. And don’t forget the Owl matching plush, which would make a perfect pairing for an Easter basket, Christmas stocking or any other time of the year!
I hope enjoyed our owl themed book, craft & snack pairing! Our beautiful paper owls have been traveling all over the house this week, flapping their wings. Next up, get ready for Easter with my Easter Chick craft & book pairing! If you’d like more information on how to get these awesome books into your home or classroom, contact me for more information!



[…] bit of flowers and sunshine in a fun project this week. If you want something with a fall theme, my Owl craft and snack would be perfect! We hit the dollar store for supplies for this flower planting sensory box. […]